Showing posts with label Food. Show all posts

Roasted Garlic Potato Soup


So...I made this really good soup last night and had to share. I'm finishing up the leftovers as I type.

If you're not a fan of garlic, you could probably just stop reading right now because there is a lot of garlic coming up!

First, roasting garlic:

Halve each head or try to chop off the top enough to expose all of the cloves. Then you drizzle it with olive oil, maybe a tablespoon or so per head. Place a couple heads on a sheet of foil and loosely wrap the foil up in the shape of the head of garlic. Stick them in the oven on 375 for about 35-40 minutes, then bring the foil down a bit to uncover them and roast for 15 more minutes, this will get you the golden brown color like in the photo below. Let them cool and then use your hands to squeeze out the roasted cloves.


At this point your house will smell amazing and you'll have all these beautiful, soft garlic cloves just waiting to be used. Here's how I used mine...

Roasted Garlic Potato Soup:

- Cloves from 2-4 heads of roasted garlic depending on how much you like garlic (I bet I used close to 30 cloves which might sound crazy but the soup wasn't overpowering since roasting the garlic mellows the flavor. Also, garlic is great for boosting your immune system, so I say load it up!)
- 4 medium/large russet or yukon gold potatoes, peeled and chopped 
- 4 cups vegetable or chicken stock
- 2 or 3 tsp salt
- 2 tsp pepper
- 1/3 cup whole milk (heavy cream or 2% would work as well)
- 1/3 cup parmesan or romano cheese

Toppings (optional, but highly recommended)
- crumbled bacon
- croutons or crostini
- chopped green onion or chives


Bring your roasted garlic cloves, potatoes, and stock to a boil and let simmer for 10-12 minutes until the potatoes are soft. Add salt and pepper and use some sort of blender to puree´. These types of recipes are the top reason I love my immersion blender! Once blended, taste and see if you need anymore salt. While cooking on low heat, add in the milk (you might need more than 1/3 cup if your soup is too thick, totally your call) and cheese and stir until combined. Heat thoroughly and serve! We ate ours topped with bacon and some crostini I made out of almost-too-old sourdough bread.

I Still Love Food


It seems my posts lately center around our current and future family. Which is good and right, but I'm here to let you know that I still love food and I still love to cook.

So, here are a few meals I've made lately that I highly recommend! They are all from the same food blog, Cookie and Kate. They are also all vegetarian/vegan which doesn't thrill my husband at first, but then he tastes it and doesn't seem to miss the meat. :)

First up: Quick Vegan Chana Masala

Photos from cookieandkate.com
This meal is quick and tasty. When I was making it I was a bit skeptical. I felt like it was too simple and quite frankly, didn't look super appetizing when all was said and done. It exceeded my expectations! I really enjoyed it and so did Devin (who doesn't love Indian food or chunks of tomatoes).

Tips: If you don't know what garam masala is, it's a blend of spices that some grocery stores carry in the spice isle. I couldn't find it at Kroger where I usually shop, but found it at Meijer. Also, I didn't have a serrano pepper on hand so left that part out and it turned out just fine.

Secondly: West African Peanut Soup


The name of this soup is a bit misleading. It's just as 'tomatoey' as it is 'peanuty'. We loved it! This was my first time using collard greens. I really like what they add to this soup and it got me thinking of other soups they'd be good in. Mine didn't turn out as thick as it seems it should have been, but was still really good.

Tips: I recommended pouring it over a little rice. And don't leave out the garnishes! We topped ours with green onions, chopped cashews or peanuts, cilantro, and sriarcha. Also, maybe my grocery sells exceptionally large bunches of collard greens, but I thought adding the whole bunch was a little much.


This was definitely my favorite of the three! I could eat this everyday, I think. Perfect peanut sauce over roasted sweet potatoes and red peppers and lots of good garnish. I actually served this as a side to the peanut soup when some friends were over for dinner. I was worried the meal was lacking in meat and overkill with the peanut theme, but they actually went quite nicely and everyone seemed to really like the meal (it's a good sign when people ask for the recipe).

Tips: I followed this recipe to the T except for replacing tamari with soy sauce. 


Lemon Tahini Dressing (with a kick)

This has been my favorite salad dressing lately! Great for hearty salads with kale or spinach or a cold quinoa vegetable salad. The options are endless! I found this recipe from Love and Lemons, a great food blog. I don't think I really altered the ingredients, just the instructions.

First, start with another jar and grate some parmesan or asiago or some similar cheese. If you don't have a fresh block of cheese on hand, just use pre-grated parmesan from the jar. :) Or just leave the cheese out, I don't think it's the star of the dressing.


You could use as much or as little cheese as you'd like. I do 5-6 good grates.


Next, grind in salt and pepper to taste.


Then press in a clove of garlic.


And add a pinch of crushed red pepper flakes. (Optional, but it's the part that adds the kick, which I recommend.)


Squeeze in 2-3 Tbls of fresh lemon juice. I did one very small lemon.


Add one tsp of agave or honey or your sweetener of choice. (Did you know now some sources are saying Agave is bad for you? This is what I hate about the health world...constantly changing their minds. I'm throwing caution to the wind on this one.)


And then 2 Tbls of tahini.


Give it all a good several shakes to mix up the tahini, and then add 2 Tbls of olive oil.


This is very concentrated, so it goes a long way. If it's too thick, add a bit of water to loosen it up. Oh and for my other favorite dressing that uses tahini, go to THIS POST

Simple Dijon Balsamic Dressing


Fact: homemade dressing > store bought.

I have had requests to share the dressings we use. So...I'll start with this one. Crazy simple. You can throw it together in a few minutes. It lasts for a week unrefridgerated. 

For all homemade dressings. The easiest way I've found is to make them in a glass jar like this:


In this particular instance I was just making a small serving for my lunch salads that week. This would also serve about 4 people for a dinner salad.

First:

Balsamic vinegar, 1/4 cup (about a fourth of the jar you're using)

Next, grind or shake in salt and pepper to taste. 


And then squirt in between 1/2 and 1 tsp Dijon. I have the cheapest kind because I really only use it for this. 


Press in one garlic clove. 


Put the lid on and give it a few good shakes until the Dijon is immersed. Then pour olive oil in until the jar is about half full. (Keep in mind this is an 8 oz jar and the recipe could be sized down or up accordingly.)


Shake well and there ya go. Use within a week. No need to refrigerate. 

Curried Pork with Basil

Last night we did an at-home Valentine's cooking date since we have other plans on Friday. I didn't really have a menu planned, but I bought some butterflied pork tenderloins and fresh basil and decided I'd wing it.

Sometimes when you do a lot of guessing and throw a meal together it totally flops. I'm happy to report this was not one of those times. It turned out to be the best meal we've had in awhile!

Thus, I must share the recipe because, one: you should make it and two: if I don't I'll forget what I did. I'm sorry to say that I didn't take pictures throughout the process, only towards the end.

Ingredients:

butterflied pieces of pork
EVOO
kosher salt
pepper
yellow curry powder
turmeric
garlic cloves
cumin
cayenne pepper
fresh basil
fresh lemon juice

About a half hour before you're ready to cook, take out your pork and dust each side with some salt, pepper, and curry powder. Rub it into each side of the pork. I was fine letting it sit on a plate on my counter for 20 or so minutes before I cooked it but you would be welcome to put yours back in the fridge. :)

Next, heat a skillet over medium-high heat with a few Tbsp of EVOO. Be generous with the oil because you'll use the excess later. When the oil is hot, place your pork into the pan and cook for about 3 minutes on each side.

After this, remove your pork from the pan and set aside. Turn your heat to low and add the following to the remaining oil in the pan: two cloves of pressed garlic, the juice from half a lemon, more curry powder, turmeric, cumin, a dash or two of cayenne, and salt and pepper to taste. (I just dumped with the curry, turmeric, and cumin, but a tsp or two of each would be good.)  Stir the seasoning into the oil until it simmers and forms a paste.

Now put your pork loins back in the pan rubbing them into the paste on one side and then on the other. Finally, let them simmer in the paste for a few minutes and add a handful of chopped fresh basil to the top like this:


After a few minutes the pork should be done and ready to serve! We had ours with curried roasted cauliflower and asparagus. (Just toss your vegetables of choice in EVOO, salt, pepper, and curry powder and roast at 400 for about 20 minutes.) Oh, and we splurged on one of those take and bake french baguettes and ate it fresh from the oven with a generous helping of butter. Yum!

Winter Butternut Squash Lasagna

This is totally my definition of comfort food. When a warm, hearty meal sounds good, it's one of the first ideas that comes to mind. I love it because the flavors blend so well together and it's not deathly cheesy like most lasagnas.

After we had Henrik, Shar brought us something similar to this. I asked her for the recipe, made it once and then lost the recipe. However, it's pretty simple so I think I remembered most of it and have made it several times sans recipe. Here's my version...

What you'll need:

1 lb ground sausage
1 meduim to large butternut squash, cooked
2 cups milk
2 T flour
1/2 box ready to bake lasagna noodles
1 cup chicken stock (broth works too)
1 cup grated parmesan
kosher salt
pepper
thyme
rosemary
sage


First off, you could leave the meat out of this if you wanted. We use spicy pork sausage, which for some of you that are all like "um, we don't eat sausage", you could use ground turkey or beef, some sort of vegetarian protein, or like I said earlier, go without a protein source. But if you want it to be really good, brown a pound of spicy sausage. :)

Next, the white sauce. Over medium-low heat, combine the milk and flour, stir with a wire whisk (important) until it thickens. Then stir in thyme, rosemary, and sage to taste (this time of year I'm using dried and I use a lot because I like it well seasoned). Combine the white sauce and your meat and set aside.


After roasting your butternut squash, scoop out the inside and put into a food processor or blender. Add the stock and salt and pepper to taste. Process until very smooth.

Like this.
I use this brand of noodles because it's way too easy not to:


But if you have another lasagna noodle you like or you're rad enough to make your own noodles, by all means...

So, your items to layer are the meat/white sauce, the butternut squash pureé, the noodles, and the parmesan. Start with a thin layer of the butternut squash on the bottom of an 8x8 or 9x9, then your first noodles, and then carry on with the layers.


Finish with the Parmesan on top and bake at 350 for 30-40 minutes.

I tend to think a 9x9 pan of this stuff goes a really long way because it's pretty filling. Thanks for introducing this to us Shar!

My Favorite, Simple Hummus

A few weeks ago, I mentioned my obsession with homemade hummus and boasted it better than anything you can buy in the store. I'm sticking to that, not because I'm some amazing chef, but because I have figured out the right ingredients, amounts, and have a good food processor. So, should you be interested, here is my go-to hummus recipe.


What you'll need:

1 can of Garbanzo Beans/Chick Peas (rinsed and drained)
1/2 cup of Tahini (sesame paste)
2 Tbls EVOO
2 garlic cloves (we like garlic, so I use 2, which could be too much for some)
Salt
1 Lemon
1/4 cup water
Cumin
Turmeric (optional, but something I think adds a nice complex)


In a food processor, or really good blender, toss in the chick peas, peeled garlic cloves, and desired amounts of salt, cumin, and turmeric. Roughly, I sprinkle in a tsp of kosher salt, over a tablespoon of cumin, and a teaspoon of turmeric (I'm all for not measuring whenever feasible).

I should note, there are a lot of things you could add at this stage to flavor. Jalepenos, roasted garlic, pine nuts, any fresh herb, etc. So this is a great base recipe to build off of.

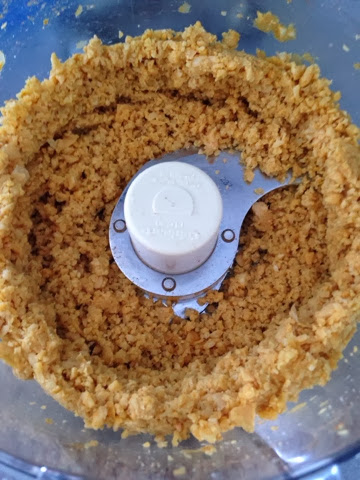
Process for about 10 seconds, and it should look like this:


Scrape the sides. Squeeze the entire lemon's juice into a cup and then add about a 1/4 cup of room temp water. In a separate small bowl, mix your 1/2 cup tahini with the 2 tablespoons of EVOO.


Start processing or blending and slowly add in the lemon juice mixture. What I've discovered is that the consistency of the hummus is totally based on the lemon juice, not on the olive oil, as I previously thought. So if you like a thicker, dryer hummus, use half of a lemon. I like my hummus smooth and thin, so I use an entire lemon. 

Process for about 15 seconds. And then it should look like this:


Scrape down the sides, start processing again, and slowly add the tahini mixture. Continue to process for 30-60 seconds depending on desired consistency. And then, final product:


It will keep in the fridge for a good week, but I think it's best when freshly made and served at room temperature. I usually make it around lunch time and eat spoonfuls as my lunch. I also have been mixing it into some of Henrik's food for a little extra protein. Sometimes I can even get him to eat it by the spoonful. :)

Enjoy!

Meatless Monday?

We don't really participate in "Meatless Monday". In fact, the other day, Devin told me I could get as crunchy as I wanted to as long as we could keep eating meat. :) I for one tend to think there's no way God filled the earth with tons of animals if we weren't meant to eat them. And, let's be real, animals are tasty. That being said, it's not uncommon for us to eat vegetarian meals, we just don't always do it on Mondays.

Our favorite meatless meal of late:

Quinoa and kale patties with chickpea curry sauce
Quinoa/Kale Patties: (ingredients in bold) (serves 4)

In a medium sized bowl, stir together 2.5 cups cooked quinoa (about one cup uncooked), 4 large eggs (seems like a lot, but otherwise they'll be a little dry), 3 chopped green onions, 3 pressed garlic cloves, one cup of bread crumbs or crushed crackers, a dash or two of salt and a few grinds of fresh pepper. Steam or lightly saute´a few stems of kale (about a cup when cooked). Stir the kale into the quinoa mixture.

Form into patties (size doesn't matter). In a large sauce pan, cook over medium heat in a tablespoon of olive oil. Roughly 3-4 minutes a side depending on how crispy you want the outside or how big you made the patties.

Sauce:
With a tablespoon of butter or olive oil, saute´a couple spoonfuls of red curry paste until fragrant. (You could also use yellow curry powder for similar results.) Stir one can of drained/rinsed chickpeas into the curry paste to coat and then add one can of lite coconut milk. Continue to stir while the sauce thickens and the curry colors the coconut milk. Let simmer for 15 minutes while stirring occasionally.

The last step is pretty obvious. Pour desired amount of the sauce over the quinoa patty and you're good to go. The leftovers were a fabulous lunch at work the following day!

Back In The Kitchen


I still love to cook, even if food posting on my blog decreased to almost nothing since the birth of our beloved boy. I miss cooking fun dishes. It's one of the many things I think I'd have more time for if I didn't work.

This summer we've been having a lot of basic foods. Grilled meats with raw or grilled veggies. Salads. Grilled Pizza. Chipotle. :) But last night I made this recipe from Mel's. It's super easy, but a fun deviation from meat and vegetables on the grill. As usual, I follow it generally but do my own thing a bit too. So here's my version of what can accurately be described as:

Basil, curry, jalapeno chicken in coconut sauce

-5 chicken breasts, cut into bite-sized pieces.

-Toss chicken with curry powder, salt, and pepper. I used a couple tablespoons of curry powder and just grinded in the salt/pepper amount I wanted (probably a tsp salt and 1/2 tsp pepper).

-Cover and chill the tossed chicken for a 20 minutes or up to two hours.

-In food processor (or hand chopped if you so desire) blend 5 garlic cloves and two jalapeno peppers. Obviously stem the jalapenos, but only seed them if you don't like spicy food. I would recommend
seeding one and leaving the seeds on the other to have some heat, but not overpowering.

- In a large frying pan, pour in a tablespoon of olive oil and saute´the chopped peppers and garlic with either a tablespoon of dried basil or a half cup of chopped fresh basil.

-Saute´until fragrant and then add in your chicken. Stir to combine all ingredients well and cook until chicken is no longer pink.

-While the chicken was cooking, I squeezed a lime over it because I love cooking with fresh lime and lemon juice.


*Note - You could stop here if you're not a coconut milk fan. The chicken would be great without the sauce.

-Wisk together a tsp of cornstarch and one can (13-14 oz) of light coconut milk.

-Add coconut milk to chicken and stir until bubbly and the sauce thickens.


-Lastly, stir in either a tsp of fresh ginger or a couple dashes of dried ginger.

-Serve over rice of your choice and garnish with fresh basil.
 (serves 4-6 people)

Go-to Brownies


Whenever we're having people over sort of last-minute and I need an easy dessert, our go-to is to grab a half gallon of Edy's Slow Churned vanilla and make these brownies (or get double chocolate raspberry cookies from Cookie Cottage). We're obsessed with these brownies and people are always asking for the recipe, so I think they're worth your time (not that they take long at all). The original recipe is from Mel's Kitchen Cafe and you can find it here. However, she has you do things like '3/4 cup plus two tablespoons' and since this is my "I'm in a hurry" recipe, I wanted something easy to memorize. So here's my (slightly healthier) adaptation after making it several times.

Oh, and since I've made these a lot, I can tell you they really are the best brownies I've made. Honestly, in the past I've always kind of preferred boxed brownies...until I found this recipe. After reading this you'll have no excuse to ever buy boxed brownies again. :)

Step-by-step:

In a microwave-safe bowl, mix together one stick of butter, one cup of sugar, 1/2 tsp salt, and between 3/4 and one cup of unsweetened cocoa powder (depending on how dark you want them). Microwave this mixture for 2 minutes, stopping after one minute to stir. Let cool until it's no longer hot.

Stir in a dash of vanilla extract (I never measure this stuff and just pour in a little, but use about a tsp if you want something exact). Add in one egg and stir vigorously, then add in a second egg and stir. Add a half cup of flour and stir until mixed.


Bake in an 8x8 or 9x9 at 325 for about 18 minutes.

I should note, these are true to their name of being 'fudgy'. If you're wanting fluffy, cake-like brownies than these aren't your guys. But you probably figured that out from the lack of flour.

Bread & Wine

A book review. (Don't miss the video and giveaway!)


Author and speaker Shauna Niequist. I've talked about her before (remember, "Things I Don't Do"?). Her second book, Bittersweet, still ranks as one of my favorites and one of the few books I'll actually re-read. Well, Shauna has a new book coming out on April 9. A few months ago on her blog she presented the opportunity for people to sign up to receive an advanced copy of Bread & Wine to review. I jumped on that chance.


From the Introduction: 
This is a collection of essays about family relationships, friendships, and the meals that bring us together. It's about the ways God teaches and nourishes us as we nourish the people around us, and about hunger, both physical and otherwise, and the connections between the two.

Why It's A Good Read:
If I had to sum it up into one statement, it would be this: Shauna Niequist has an uncanny ability to write about life in a way that resonates with me (and probably most women). I always read her books with a pencil in hand because I'll no doubt find lots to underline. I find myself thinking, "yes, that's it, I totally know that feeling"! She articulates what so many of us think and feel but may have a hard time putting into words.

If you aren't a 'food' person, I think you could still really enjoy this book. If you are a food person - you'll like it that much more. One of my favorite essays is entitled "hungry" and Shauna quotes an NPR show host who says that 'there are two kinds of people in the world: people who wake up thinking about what to have for supper and people who don't'. Being in the former group, this book was right down my alley. I love all the food talk and so many great recipes!

If I'm being honest:
I don't like the cover photo. I really like the title font and design, but the photo for the book cover is just...old school, is that the right term? It makes me think of table centerpieces from a wedding in the 90s. Her first two books had very simple but artsy covers and I think she should have stuck with that theme. I guess you could say it's a good thing I didn't judge this book by it's cover (come on, you had to know that line was coming).

My only other criticism would be how much she mentions things like gluten free, food allergies, gluten free, dairy free, gluten free, oh and did I mention, GLUTEN FREE. Maybe I would feel differently if I were one of the 5 million people who have self-diagnosed myself with a gluten intolerance. Yikes, okay, I'll stop my soapbox there. Anyways, I'm all for being flexible for people who truly have food allergies, but the energy she spends on that subject got a little old.

DINNER PARTY:
I decided a fun way to 'review' the book would be to host a dinner party and make recipes from the book. So Devin obligingly jumped on board and we set up a night to cook dinner for some friends.

We didn't get the best video coverage. I mean, when your baby is crying, a glaze is boiling over on the stove, the meat is ready to come off the grill, and all your guests are showing up...the last thing on one's mind is taking video. But here's what we could scrape together....our guests made the night so fun! Oh and the food...the food was really, really good.


And here's a little look from toffee disasters one and two:

Undercooking then back on the stove which lead to overcooking. It just did not go well.

Nothing like toffee filled with itsy bitsy pieces of plastic.
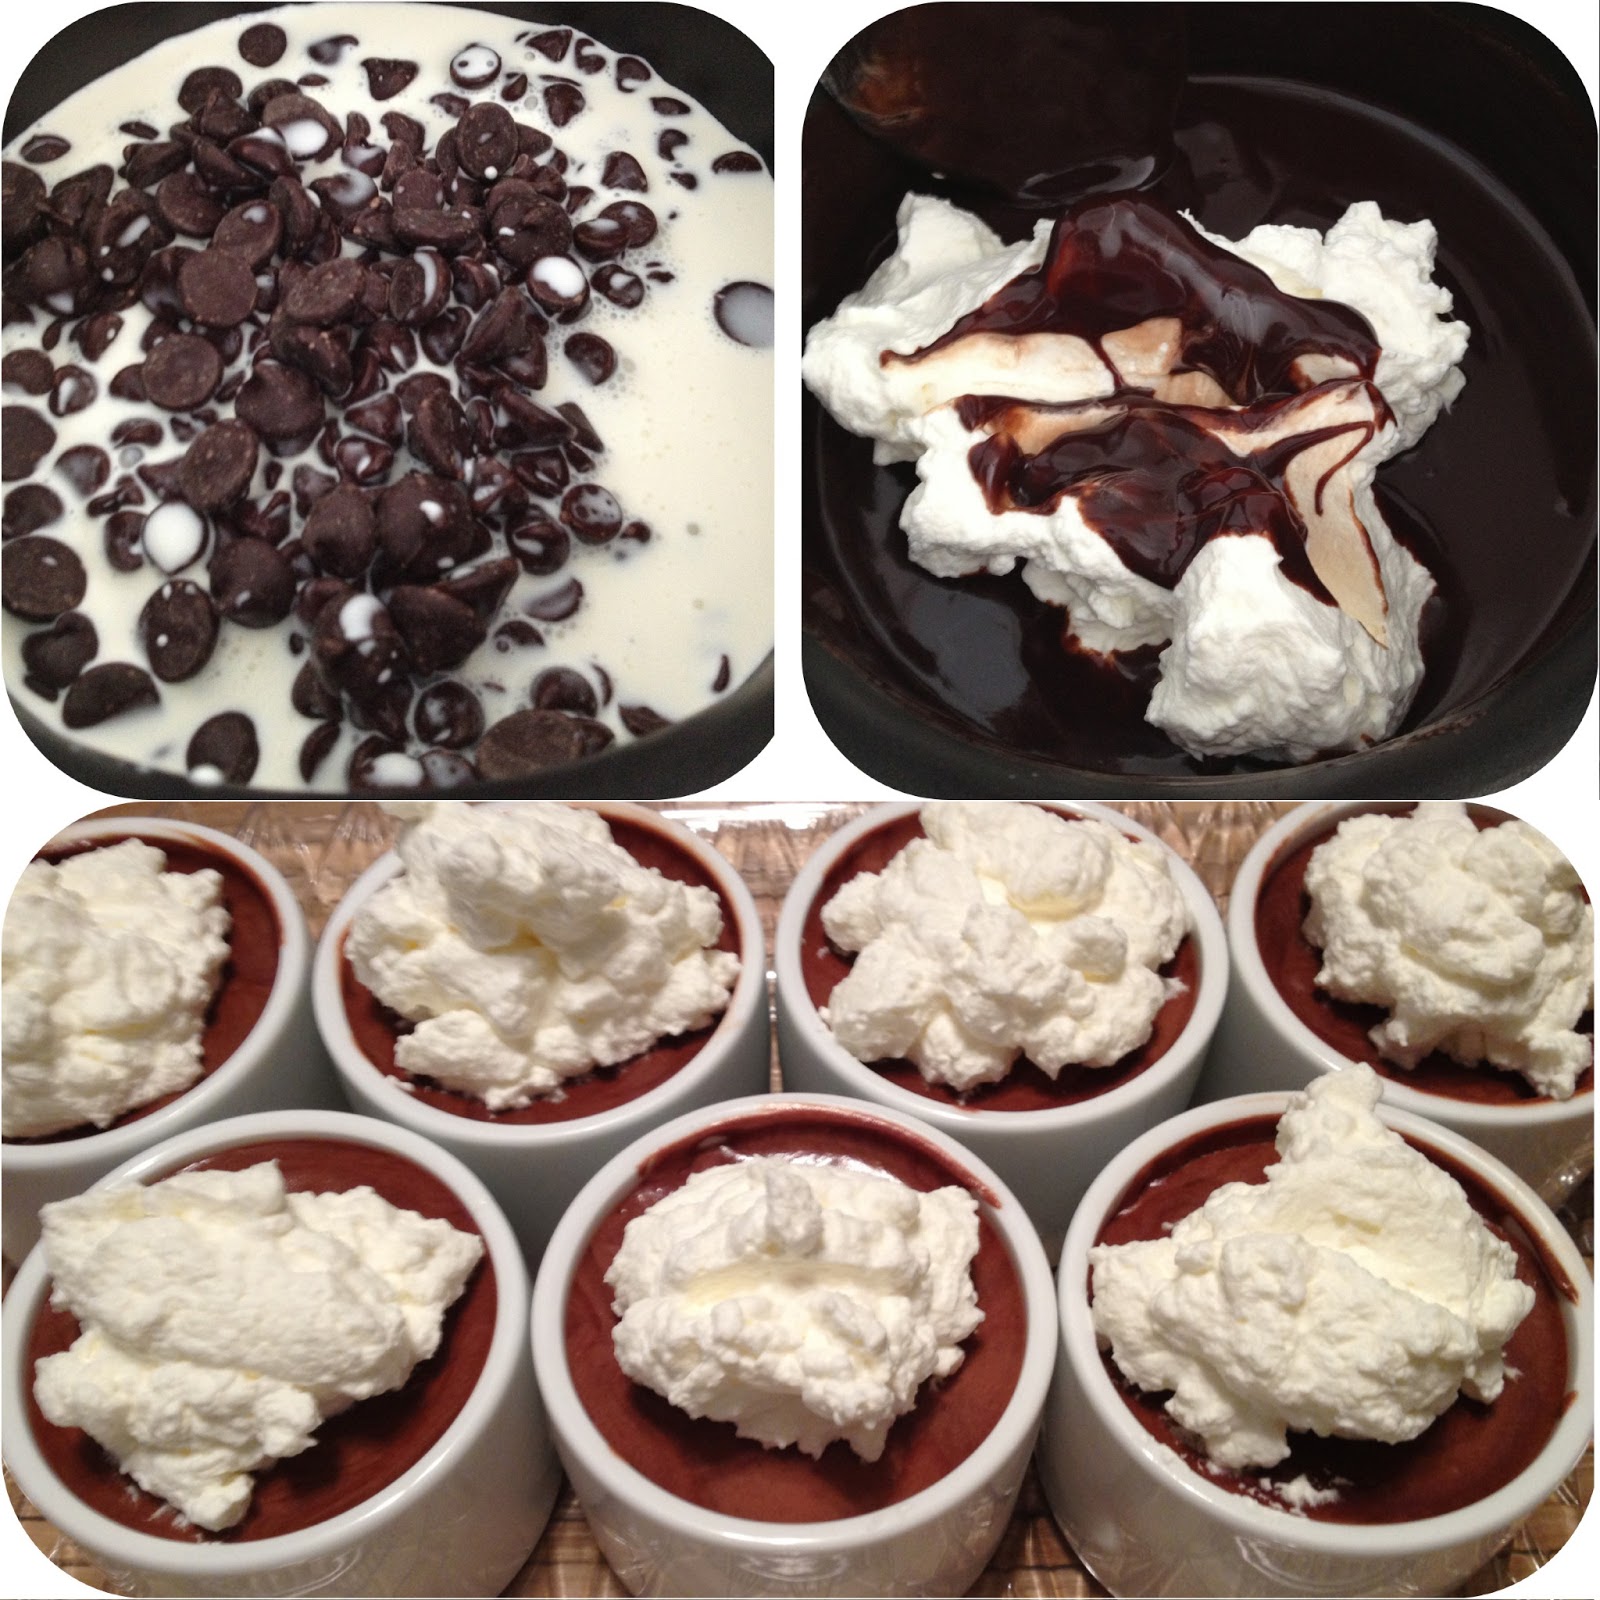
MOUSSE

Grill master husband and food extraordinaire.

Finally used these napkin rings after having them for over a year.

Daveana & Henrik :)

At the end of the day:
I love cooking. I love good food. And I love how Shauna writes about life. Which means I loved this book and definitely recommend it!

Want to read this book? I'm giving away a copy to one of you! Leave a comment to be entered! I'll draw for the winner on April 9, the day the book comes out, and send it your way!

Greens

Are all the rage in cooking right now. Kale, spinach, collard greens, mustard greens, swiss chard, and the list goes on. They're great to blend up raw in a smoothie, but also such a rich, satisfying addition to cooked dishes.

As I said in my previous post - I gave mustard greens a try. I don't believe I'd ever even tasted them before. We're fans! My Real Simple had a recipe for lentil/sausage stew with mustard greens and it was so delicious. I'm already looking forward to having the leftovers tonight!

I'm not finding the recipe online for some reason...but I altered it anyways...so here's my take on it...

In a large pot or dutch oven, saute 3-4 cloves of chopped garlic with a tablespoon of olive oil. After a minute or so, add in 3/4 pound of your choice of cooked sausage (or pre-cook raw sausage and then add the garlic while you cook it). I used this:


al fresco sweet apple chicken sausage. This is by far our favorite chicken sausage and a healthier alternative to pork sausage. It's not that I wouldn't use pork sausage (it's so good), but I loved the chicken sausage for this recipe. Since the sausage is fully cooked, you don't want to dry it out, so just cut it into large bite-sized pieces and brown it for a minute or two with the garlic before adding in the rest of the ingredients.

This recipe is so easy! After the first step, just add the following in any order:

- 2 medium sweet potatoes, peeled and cut into one-inch chunks
- 1 - 2 cups dried lentils (depending on how lentil-y or thick you like your stew)
- 6 cups low-sodium chicken broth
- two pinches of kosher salt
- pinch or two of freshly ground pepper
and finally, the star of the dish,
- 6 cups (or one bunch) of mustard greens, stemmed and torn (it will seem like a huge amount and fill up your pot, but it'll cook down so fast, so add it all!)


Bring it all to a boil and then turn down heat and let it simmer partially covered for about a half hour or until the sweet potatoes are soft.


Like I said - we loved this. It's a great healthy winter meal option and I found it very fun to make!